RGB Internet Pumpkin
Just in time for Halloween, I modified my previous Raspberry Pi Internet LED Control project to control an RGB LED, and stuck it inside a fake pumpkin. Now I have an internet controlled RGB pumpkin!
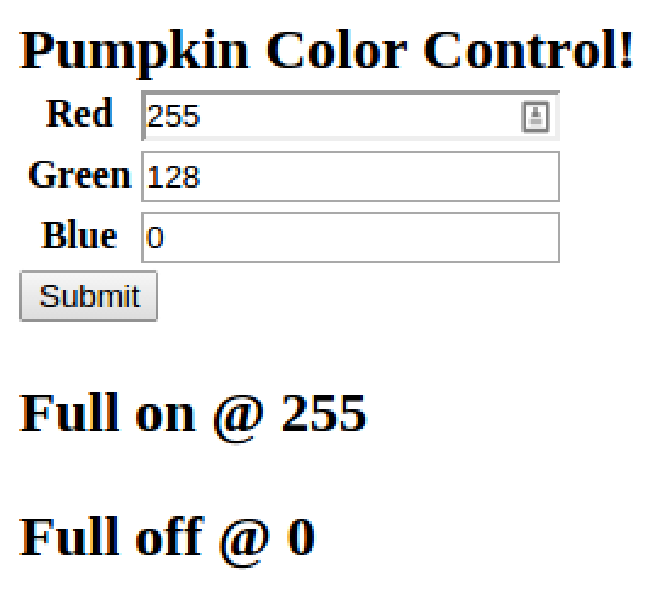
The code is basically the same as the old Raspberry Pi Internet LED Control, but instead of using four links to turn four LEDs on or off, it uses a form to control the levels of the three legs of the RGB LED.
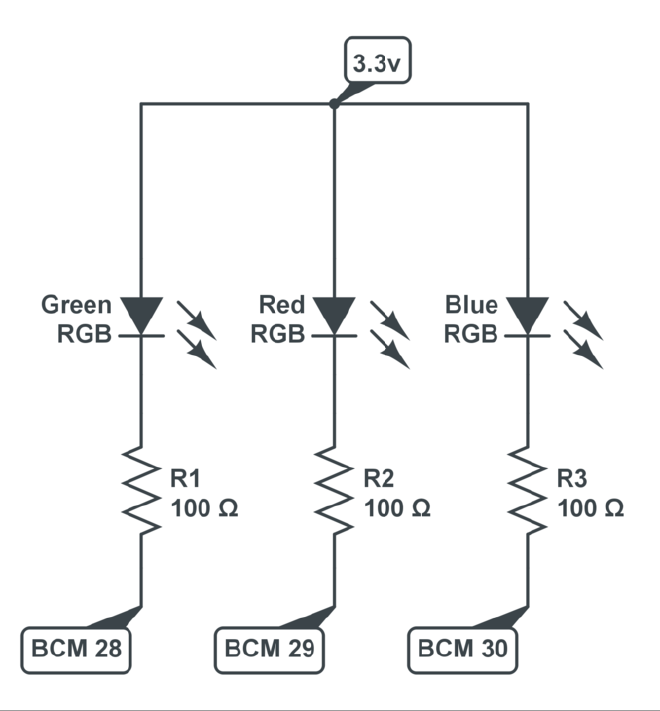
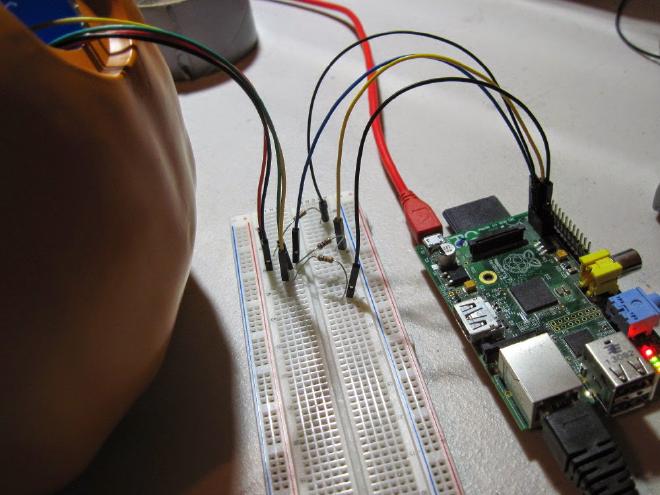
I used a common anode diffused RGB LED for this, which I received from the Sparkfun dumpster dive a few months ago.
I wired it up to the extra pins on the Rpi V2, BCM numbers 28, 29, and 30. The resistors are each 100 Ohm. Some wiring guides for RGB LEDs have a 180 Ohm for the red, and 100 for blue and green. I used what I had, which was 100. It works fine for me.
After trying out a few test programs, I was ready to make it interface with the web. At first, I started with my old code and was modifying it to take any url operator (?color=ff00ff), but then I found the WebPy form library. This is a much more elegant solution, although an even better one would use something like Ajax to enable live updates.
At first, I had it so that 100 was full off and 0 was full on. I later changed this to be compatible with color pickers that give RGB values from off at 0 to full on at 255.
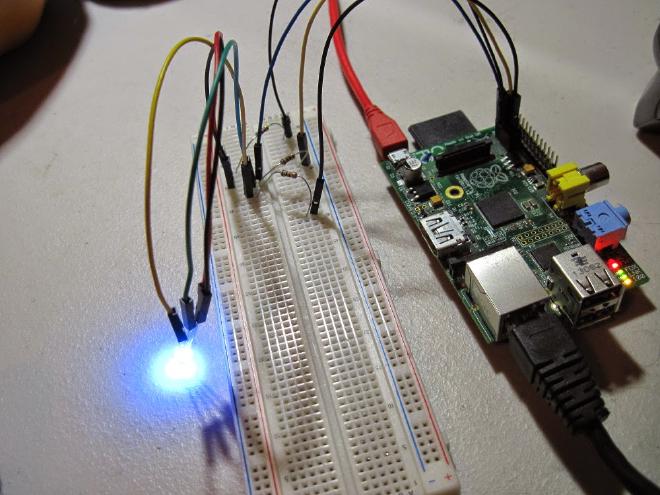
Here’s a video of the initial test:
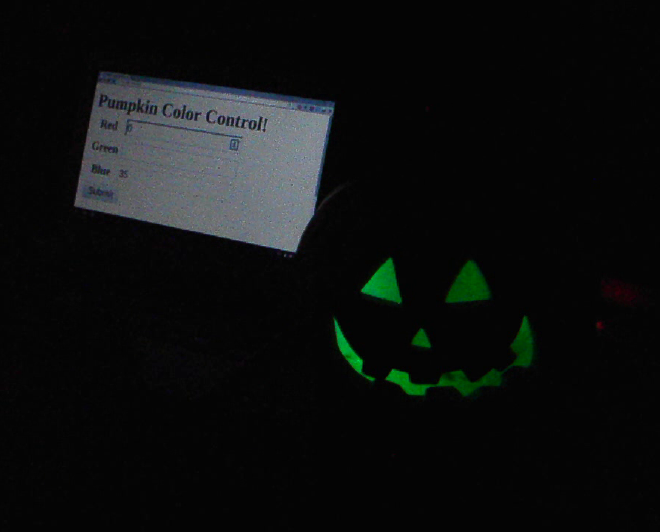
The color of the LED is pretty hard to pick out, because it needs a diffuser. A popular thing to use is a ping pong ball with a hole in it. Instead, I used a fake pumpkin.
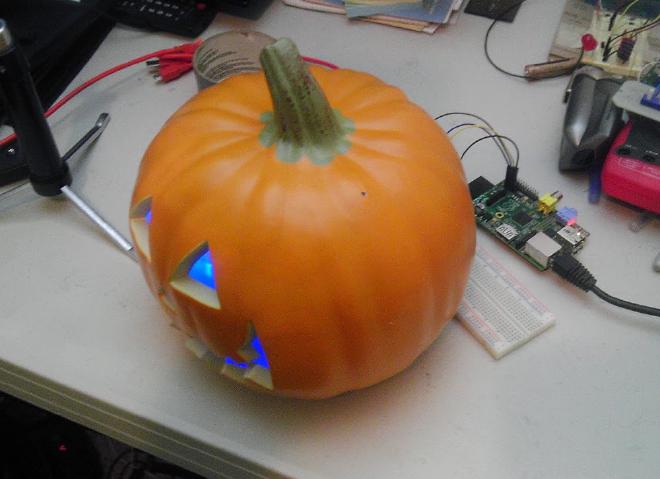
This pumpkin used to have an incandescent lightbulb in the back. I took that out and just placed the LED inside.
This works very well. The inside of the pumpkin is matte white, so it shows the correct color.
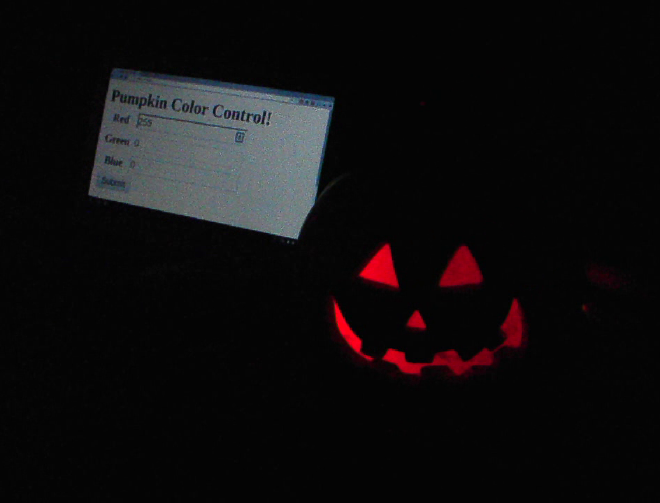
Here’s a video of the final product:
I’m pretty happy with it. The plan is to put it on a table for a Halloween party and give out the address, which should prove entertaining for five minutes.
Update: #
I added phant.py from python-phant to this, so now it outputs to data.sparkfun.com.
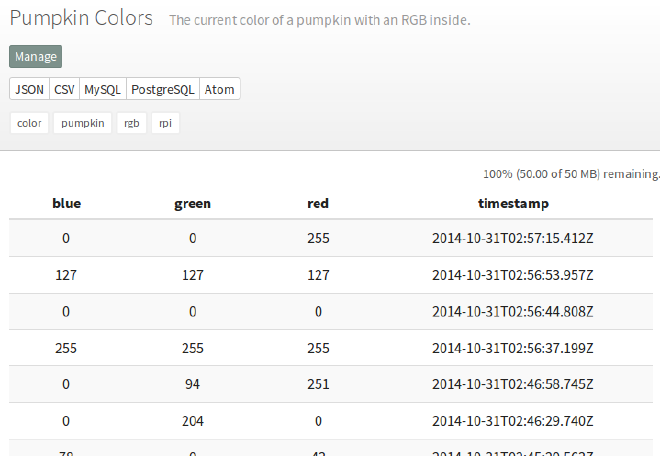
I also adapted their tutorial on using google charts to make a html file with a graph of the values.
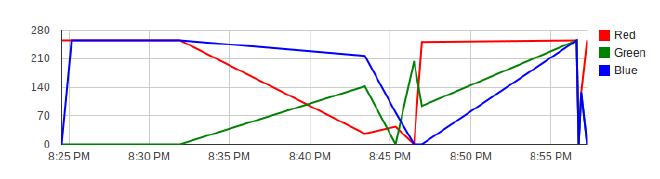
here. #
Comments: #
Heh, just needs some animatronics to move the &quo… #
Heh, just needs some animatronics to move the “beam” around inside.